Hello Again!
Sorry about the delay on this Blog post, but we are finally here and just in time (thank goodness for a month with 5 Mondays).
This week I’d like to talk about armatures. What are armatures? Think of them as the skeleton within a miniature (or larger sculptures). They are usually made of thin wire and using them when making a miniature is practically essential.
But why is that? Let’s start by looking at the advantages of using an armature, then we will move on to discussing what to use and how to make one.
Advantages of an Armature
The sculpting putties used to make miniatures are soft and pliable. Just want you want when sculpting, but it also means it cant support much weight, and it too much is used at a time, it will sag and deform before it sets. Armatures provide a rigid (mostly) structure that can support the weight of the putty while it is being worked on and while it sets.
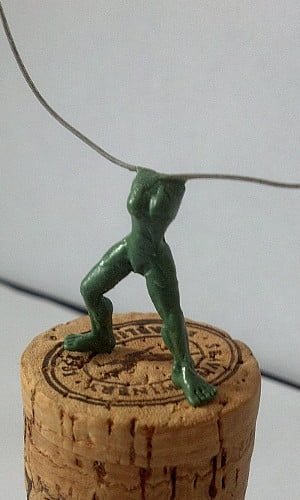
But that’s not the only thing that armatures help with. They make the final miniature stronger (like steel reinforcing in concrete), which can be an distinct advantage when being shipped or during casting. They can be used to anchor a miniature into cork (or similar object) or attached to a clamp in such a way as to make the miniature easier to handle while working.
Finally, they are also useful for establishing a miniature’s proportions early on, before too much detail has been applied. This means you can verify correct proportions without loosing to much work if they are wrong, and to prevent to much scale creep that can effect proportions (my early miniature often had this problem).
Armature Materials
Ok, but what do you use for an armature? Some companies sell ready made metal armatures, already formed into rough humanoid shapes, (or even as nudes), but personally I make my own armatures from ‘florist wire’ (wire used by florists to keep stems straight).
Personally I recommend getting the uncoated wire, as it makes it easier for the putty to adhere to it. Coils of wire from a hardware store or hobby store are also pretty good, though you want the stronger stuff, so copper wire is not great.
Making an Armature
There is no one ‘right’ way to make an armature (when using wire), but I will detail my own method here.
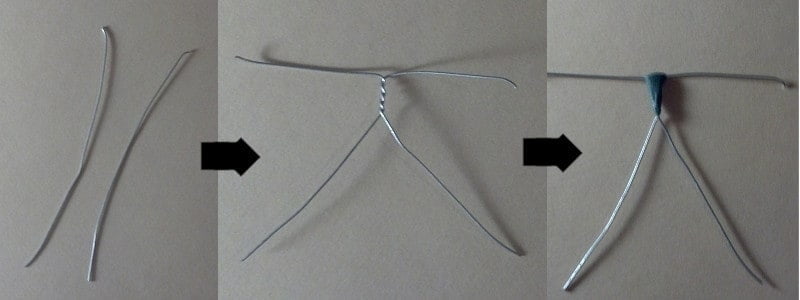
To begin you will need two pieces of wire, each long enough to pass through a leg, the torso, and an arm, with some left over. For 28mm miniatures I usually use about 40 to 50 mm.
You then want to twist the two pieces together, the twisted area will be in the torso, the 4 un-twisted lengths will be the arms and legs.
You then build up the shape of the miniature by building masses out of putty that loosely correspond to the rigid parts of the body. (Torso, forearm, upper arm, thigh, calf). After the putty has set you can pose the armature and fix it to a base.
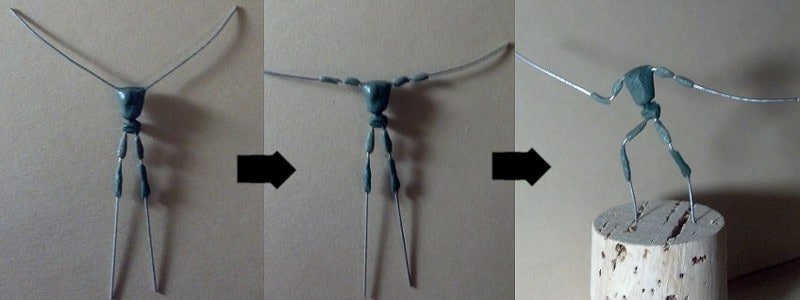
You notice I haven’t left any armature for the head. This is because I like to make faces separately from the rest of the body, with their own short piece of wire, which is anchor into the torso only once I am happy with the face and the torso has been decently worked up.
Ok, well, that was pretty dense this week. Next week I will be on vacation, so we will probably be taking a short break from the blog posts for a while, unless I can get a guest blog, or something. We’ll see.
– Pendix Out