
All right, I’ve wanted to talk about the tools I use for sculpting miniatures for a while, particularly for those people interested in learning how to sculpt miniatures themselves, or just want an insight into how I work.
Looking at them in small groups; I’ll do my best to explain what they are and how I find them useful. This is hardly a comprehensive list of possible tools; this is just the ones I use. If you are starting out, try a variety of things; only you can work out what tools and techniques work best for you. Some of these tools are bought from various art supply retails, and some are found and re-purposed (dental tools are a popular); again, find what works for you.
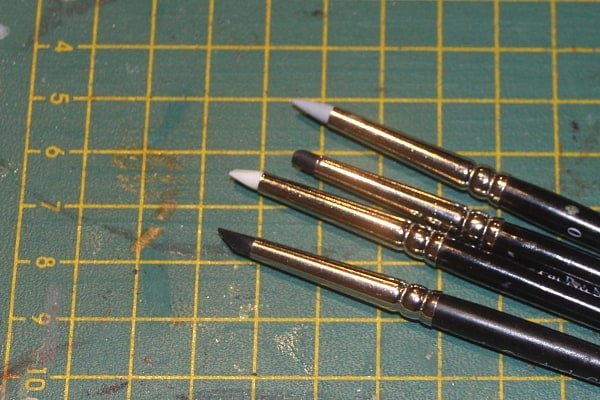
Pointy Things
Some of my favourite tools are in this category. Used for making the smallest marks, and details. In particular the smallest one, (a compass point from a high quality geometry drawing set) is my personal fav, as it has an extraordinarily fine point, and can make the finest detail marks, and move putty around on the smallest scale.
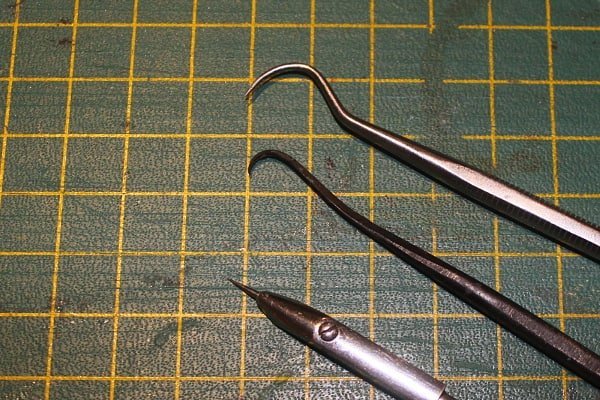
Not Pointy Things

These tools have small, hard, metal, ends, but not points. Useful for putting putty where it needs to go, and creating certain types of details (I use one of these to create the wax part of purity seals). Helpful in smoothing down seams, but not for creating large, smooth surfaces (for that see the next tools on the list).
Rubber Clay Shaper Things
A more recent addition to my pallet of sculpting tools, these small, flexible rubber ‘clay shapers’ are excellent tools for moulding the surface of fresh putty.
Functioning much like fingers would on a larger sculpt, they yield against the putty and make it easier to smooth surfaces or create rounded organic forms or even just to get the putty were you want it before adding detail. They take a bit of time to get used to, and you’ll want to get a variety of hardnesses and shapes, but I’ve found them to be well worth it.
Other Things

- The craft knife is an invaluable sculpting tool. Before the putty has set the blade can be used to remove small quantities putty or create thin lines, and the hard edge of the back of the blade can be used as a shaping tool. After the putty is set it can be used to trim areas, and create hard edges.
- The tiny hand drill (often called a ‘Dremel’), is primarily for putting holes into a set piece. Useful for creating sockets for removable parts, and holes for anchoring new armature wire.
- Various files and sanding tools are good for ‘post processing’, working on the sculpt after the putty has set. Best used to smooth out imperfections and seams.
Ok, that’s it for tools I use directly on the sculpt. There are a bunch of secondary tools which are useful in the process, but I will discuss them another time.
If you have any questions please feel free to put them in the comments section.
– Pendix Out